Visit My Other Blogs

Looks Good In Polka Dots
Where It's Not Just About Mothering, Gluten Free Cooking, and Socially Conscious Living

Feeding 10 for Under $10.00
Whole Food Meals on a Budget

Friday, May 28, 2010

Kefir Ice Pops, Or Why My Kids Get Popsicles for Breakfast

Since Spring is here and Summer is just around the corner... my kids want popsicles constantly.  I can't stomach giving them sugar, dye and artificial flavor disguised as a treat.  Instead, we make our own ice pops nearly every day.

I purchased 3 molds (each makes 8 smallish lollies) for about $2/each.  If you don't have molds, then simply use small paper cups (3 or 5 oz) and cut straws or wood sticks.

When I give the kids their kefir smoothies at breakfast (instead of as an after school snack) we usually have a bit left over since their bellies are already pretty full of GF oats and almonds.  I pour the extra into the ice molds, add the sticks and freeze.  It's a simple matter to blend up another small batch of smoothie to fill the mold (or several molds) if needed. 

Our favorite ice pop flavors are:
  • Kefir smoothie w/ banana, spinach, and mixed berries or strawberries (Berry-Licious)
  • Kefir smoothie w/ banana, spinach, cocoa powder & honey (Chunky Monkey)
I'm so thrilled with these healthy treats that my kids get to enjoy them at any time of the day... popsicle for breakfast, sure thing!  I always balance breakfast with protein and a complex carb, so eggs usually go with the ice lollies.  Yum! 

*For those who like a lower GI sweetener, use Palm (Coconut) Sugar which has a GI of 35 or a bit of stevia.  The riper the bananas, the less sweetener needed.  You can also soak dates in water overnight and use them in the smoothies instead of sweetener. 

**Quick prep trick... we make containers of smoothie prep to keep in the freezer.  This ensures a tasty, icey smoothie and makes prep a lot easier in the mornings.  By allowing the bananas to get nice and ripe on the counter, then peeling and freezing, they don't go bad and are the prefect icey sweetness for the smoothies.  

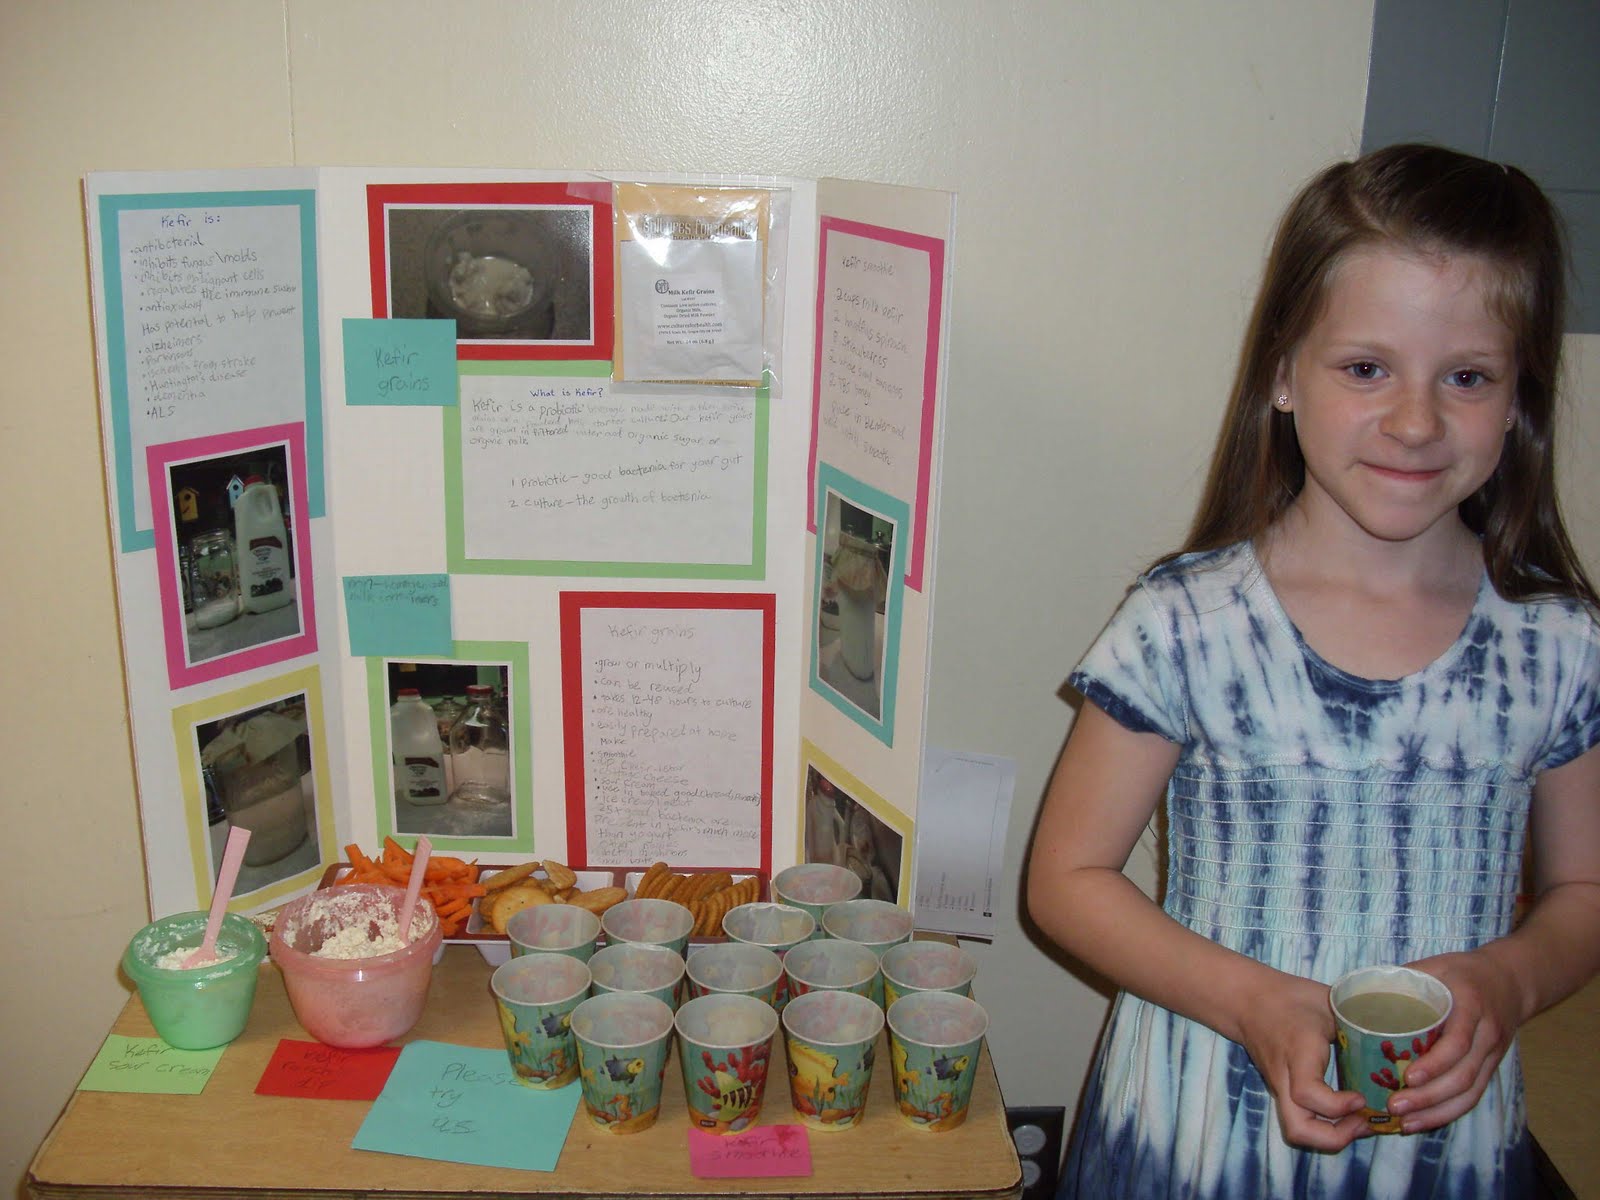
***My kids love our kefir smoothies so much that my 4th grade daughter, Kaylee just did a "How To" speech on making kefir smoothies.  She took the ingredients to school and everyone in her class got a smaple.  She said, "Everyone loved them, Mom!".

Monday, May 24, 2010

A Kefir Science Fair Project

Here's 8 year old McKenzie with her Kefir Science Fair project.  She handed out samples of berry-banana-spinach smoothie, kefir sour cream, and kefir "ranch" style dip.

The report board shows our non-homogenized milk and a couple jug styles (glass and plastic) that we can buy it in locally.  We also had a package of dry kefir grains and business cards from Cultures for Health.

Wednesday, May 12, 2010

Blueberry Kefir "Soda"

I've been making water kefir for a few weeks now.  Our first attempts didn't result in any flavors the kids (or I) enjoyed.  I've finally found a winner...


Blueberry Kefir Soda, isn't it pretty?

Yes, it does smell fermented, similar to a berry beer.  It's very tasty and super nutritious.

So, how can you make it?

Step 1:Order some water kefir grains and grolsch style bottles.
Step 2: Follow instructions for rehydrating your grains, if necessary
Step 3: To being the water kefir process, dissolve 1/4 cup evaporated cane (or SuCaNat) sugar in 1 cup HOT water.  Pour into a clean, quart size glass jar.
Step 4: Fill jar (leaving a bit of space at top) with cool water. (Do NOT use city tap water or water that has been carbon filtered. If you have city water, boil and allow to cool first to remove chlorine.)
Step 5: Once the water has reached room temperature, add your kefir grains.
Step 6: Cover jar with a coffee filter or towel and secure with a rubber band.
Step 7: Set your jar in a cool, dark cabinet for 24-48 hours (room temp varies, the warmer the room, the less time to ferment).
Step 8: Strain your kefir grains out and prepare your next batch.
Step 9: Pour your finished kefir water into grolsch style bottles.
Step 10: Add organic 100% blueberry juice.  I use 2/3 kefir water, 1/3 blueberry juice
Step 11: Close your bottles and allow to sit on the counter for 2-3 days until bubbly.
Step 12: Once bubbly, store in the fridge and enjoy as desired!

*Update:  I allowed the blueberry soda to bubble on the counter for 2 days prior to placing in the fridge, however it keeps getting more and more bubbly in the fridge.  The kids are loving it... we are getting a good 1/2 inch head on each cup we pour!  Bubbly-licious! 

Saturday, May 1, 2010

A Kefir Science Fair Exhibit

My 8 year old has Celiac. She has had severe bowel issues despite removing the gluten from her diet (Ahem... she is 8 and sneaks food... Mommy isn't dumb). 

Once we began introducing daily kefir (in the form of a smoothie), she has improved dramatically.  This seems pretty simple to us:

Bowel issues from Celiac damage + daily, nourishing, whole milk kefir full of happy bacteria = healthy, habit bowels.

We've decided she will learn all about kefir and its wonders.  Then she will make a fabulous display and will serve kefir in a variety of forms (samples of smoothies, herb "sour" cream dip, fruit "cream cheese" spread). 

I can't wait to see the finished project.  The science fair exhibit is on May 14th, so look for a post shortly after!

Friday, April 30, 2010

Kefir Smoothies

Our family enjoys a healthy, nourishing, kefir smoothie every day.  For my daughter with Celiac, this has completely changed her bowels and made her so much happier and healthier.

For four children, I use 2 cups whole milk kefir + 2 ripe bananas + 1-2 cups frozen berries + 2 cups blanched spinach + 2 TBS honey.

We tried these without the spinach and the kids all agree the smoothies are better WITH spinach. 

There have been a lot of flavor experimentation going on... the favorites are either mixed berries/banana or strawberry/banana.

Monday, April 19, 2010

Kefir Sour Cream and "Ranch" Dressing

Kefir can make an excellent (not to mention a nutrient dense super food) sour cream!  Here's how:

Once your kefir is done and the grains are removed, line a large mesh strainer (I ordered mine from Cultures for Health) with a couple layers of cheesecloth.  Place strainer in a bowl or other collection container.  Pour desired amount of kefir into the cheesecloth/strainer.  Allow to sit in the fridge for a couple of days, until the whey has drained off and you have soft curds.  Whisk gently and enjoy this tangy treat! 

Another option at this point is to whisk in a few tablespoons of your favorite jam and enjoy it as a cream cheese on your bagels or crackers.  You can also sweeten lightly with honey and enjoy on fruit!

Add a flavorful punch (and enjoy as a veggie dip or spread on whole grain crackers) by whisking in a garlic seasoning blend of your choice.  Here is a recipe for a kefir dressing, this uses fresh kefir (not whey strained/thickened).

Wednesday, April 7, 2010

How to Make Dairy Kefir

Now that you've obtained some dairy kefir grains, it's time to culture your first quart.  It's simple and really only takes about 5 minutes to get a batch going.

First, choose your "milk".  Nonfat is NOT a good idea, it doesn't seem to work well.  The best option is RAW, milk (goat or cow).  Second best is non-homogenized whole milk (We buy ours at Whole Foods in glass 1/2 gallon jars).  A great dairy-free option is So Delicious brand coconut milk (refrigerated, 1/2 gallon carton).

Second, wash and sanitize your quart sized glass jar.  I wash in the dishwasher, then pour boiling water in and over the jar and allow to cool on the countertop.  (Wash and sanitize your jars between batches.)

Next, fill the jar to about 1 inch of the top with your milk.  Allow to sit on the counter for an hour or so to bring to room temperature or place in a pan of hot water to heat slightly.  Don't overheat, the kefir grains can be killed with heat.  Many times, I don't warm the milk at all.  Cold won't hurt it but will slow the culturing process.

Now, simply add your kefir grains to the jar of milk, cover with a coffee filter and secure with a rubber band.  I then put my jar in the cabinet and allow to culture for 12-48 hours (12 for warmer areas, up to 48 for cool houses like mine).  Be sure to keep several feet of space between your cultures (water kefir, kombucha, yogurt, etc...) to prevent cross contamination.

When I allow the culture to sit for longer periods, I get a separation of whey.  This isn't a problem, but does give a more tangy flavor.  I simply stir it back in.

*Note on using coconut milk- we are using So Delicious Vanilla Coconut Milk and it is FABULOUS in kefir.  I kid you not... when using this in smoothies, I don't even have to sweeten them! Yum!